Many kitchen appliances serve multiple purposes, yet most people never explore their full potential. Your contact grill sitting on the counter can do much more than cook burgers and steaks. It can transform into an excellent sandwich grill that creates perfectly toasted paninis with beautiful grill marks and melted fillings. This guide will show you exactly how to make the most of this versatile kitchen tool.
Why Your Contact Grill Works Perfectly for Paninis
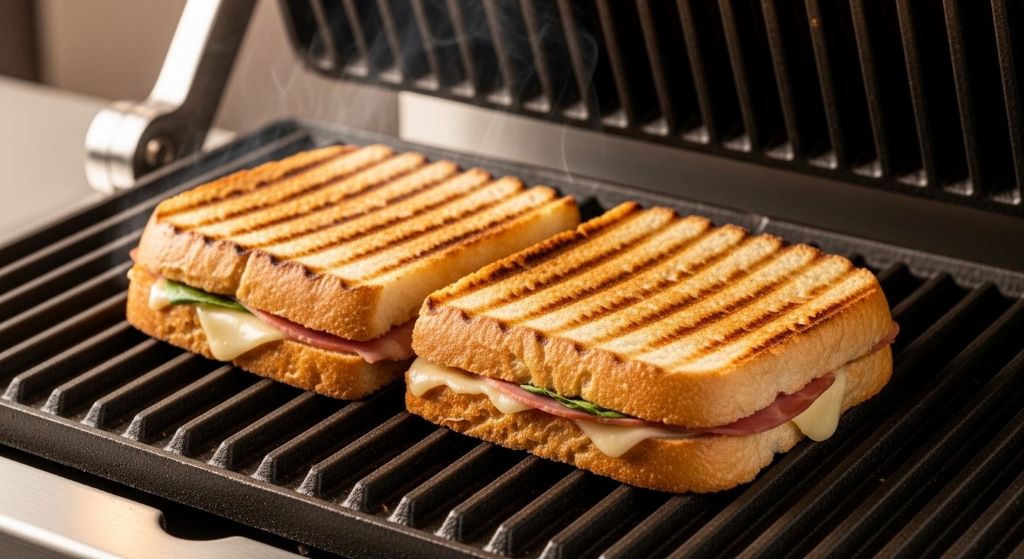
Contact grills and panini presses share similar design principles. Both apply heat from top and bottom simultaneously. Both create pressure that compresses ingredients together. Both leave attractive grill marks on bread surfaces. Therefore, the transition from grilling proteins to making sandwiches becomes natural and effortless.
The main advantage lies in maximizing your kitchen investment. Instead of purchasing separate appliances, you can use one device for multiple cooking tasks. This approach saves counter space and reduces clutter. Moreover, it eliminates the need to store rarely used equipment.
Preparing Your Contact Grill for Sandwich Making
Before you start creating delicious paninis, proper preparation ensures success. First, clean the grill plates thoroughly. Any residual flavors from previous cooking sessions can transfer to your bread. Use a damp cloth or sponge to wipe down both plates. However, make sure the appliance is unplugged and completely cool.
Next, check the temperature settings. Most contact grills offer adjustable heat controls. For paninis, medium to medium-high heat works best. This temperature range toasts bread without burning while melting cheese and warming fillings adequately. Additionally, some models include specific settings for different foods, which can guide your selection.
Preheating is crucial. Allow your press grill to heat for approximately five minutes before placing your sandwich inside. This step ensures even cooking and prevents soggy bread. You’ll know it’s ready when the indicator light signals or when you feel consistent heat radiating from both plates.
Selecting the Right Bread and Ingredients
Bread choice significantly impacts your panini results. Ciabatta, focaccia, and sourdough work exceptionally well. These varieties have sturdy structures that withstand pressure without becoming mushy. Their texture also creates satisfying crunch when toasted. Meanwhile, avoid overly soft breads that might compress into thin, unappetizing layers.
Slice thickness matters too. Aim for bread pieces about half an inch to three-quarters of an inch thick. Thinner slices may burn before fillings heat through. Thicker cuts might leave you with toasted exteriors and cold centers. Therefore, finding this balance ensures perfectly cooked sandwiches every time.
For fillings, consider moisture content carefully. Extremely wet ingredients like fresh tomatoes can make bread soggy. Pat vegetables dry with paper towels before assembly. Alternatively, roast or grill vegetables beforehand to reduce water content. This preparation step makes a noticeable difference in final texture.
Cheese selection also plays an important role. Mozzarella, provolone, cheddar, and Swiss melt beautifully under pressure and heat. Layer cheese next to bread slices rather than in the middle. This placement creates a barrier that protects bread from moisture while adding flavor. Furthermore, the cheese helps bind ingredients together.
Assembling Your Perfect Panini
Start with a clean, flat surface for assembly. Lay out your bread slices and arrange ingredients systematically. This organization prevents forgotten components and ensures balanced distribution. Additionally, it speeds up the process when you’re making multiple sandwiches.
Apply butter or oil to the outer surfaces of bread. This step creates golden, crispy exteriors with enhanced flavor. You can brush oil directly onto bread or apply butter in a thin, even layer. Some people prefer mayonnaise, which also browns nicely and adds tangy richness. However, use these spreads sparingly to avoid excess grease.
Layer ingredients thoughtfully. Place heavier items like meats on the bottom. Add cheese next, followed by lighter vegetables or greens on top. This arrangement prevents delicate ingredients from getting crushed. Moreover, it creates structural stability that holds together when you take that first bite.
Don’t overstuff your sandwich. While it’s tempting to pile on ingredients, too much filling prevents proper pressing and even heating. The grill needs to compress the sandwich slightly. Overfilled paninis may spill out during cooking or remain cold in the center. Therefore, moderation leads to better results.
Cooking Techniques for Best Results
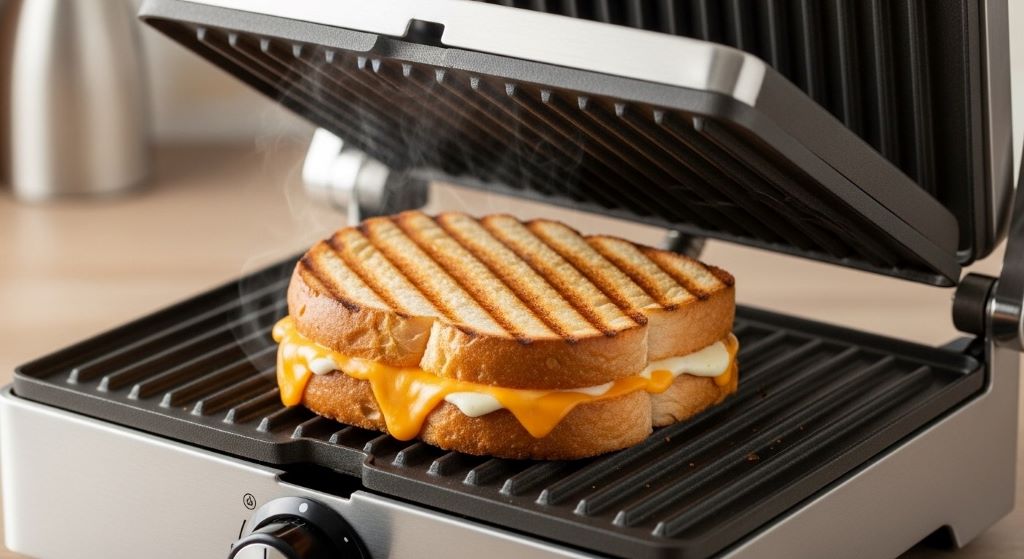
Open your preheated contact grill and place the assembled sandwich in the center of the bottom plate. Close the lid gently but firmly. The top plate should make contact with the bread surface without crushing it completely. Most grills have floating hinges that adjust to sandwich thickness automatically.
Cooking time typically ranges from three to five minutes. However, this varies based on your specific appliance and ingredient choices. Watch for visual cues instead of relying solely on timers. The bread should turn golden brown with visible grill marks. Cheese should melt completely, and you might see slight oozing at the edges.
Resist the urge to open the grill frequently. Each time you lift the lid, heat escapes and cooking time extends. Additionally, premature opening can cause cheese to stick to the top plate. If you must check progress, wait at least two minutes before peeking inside.
Some contact grills lack weight in the top plate. If yours seems too light, you can add gentle pressure by pressing down slightly on the handle. This technique mimics traditional panini presses that apply more substantial compression. Nevertheless, don’t force it too hard, as this might crack bread or squeeze out all your fillings.
Temperature Control and Timing
Understanding heat management separates good paninis from great ones. If your sandwich browns too quickly on the outside while remaining cold inside, reduce the temperature. Conversely, if bread stays pale after five minutes, increase the heat slightly. These adjustments help you dial in perfect settings for your specific breakfast maker.
Different ingredients require varying cooking times. Sandwiches with already-cooked meats need less time than those with raw vegetables that benefit from softening. Similarly, thick sandwiches need longer cooking periods than thin ones. Therefore, develop a sense of timing through practice and observation.
For multiple sandwiches, maintain consistent temperature between batches. Some grills automatically adjust when opened and closed repeatedly. Others may need brief reheating periods. Taking these moments ensures each sandwich receives proper treatment. Furthermore, it prevents later sandwiches from cooking unevenly.
Creative Recipe Ideas and Variations
Classic Italian combinations never disappoint. Try mozzarella, tomato, and basil with a drizzle of balsamic glaze. The contact grill melts the cheese beautifully while slightly wilting the basil and warming the tomatoes. This simple combination showcases how basic ingredients shine with proper technique.
Breakfast options expand your morning routine. Layer scrambled eggs, cheese, and breakfast sausage between English muffin halves. The grill compresses everything into a portable meal that’s perfect for busy mornings. Additionally, you can prepare several at once for family members with different schedules.
Vegetarian choices offer endless variety. Grilled eggplant, roasted red peppers, arugula, and goat cheese create sophisticated flavors. The heat from the grill slightly wilts the arugula while warming the vegetables. Meanwhile, the goat cheese becomes creamy and spreadable.
Leftover transformation works wonderfully with paninis. That roasted chicken from dinner becomes tomorrow’s lunch with some cheese and vegetables. Thanksgiving turkey gains new life with cranberry sauce and brie. This approach reduces food waste while creating exciting meals. Therefore, view your refrigerator contents as panini potential.
Sweet paninis deserve mention too. Nutella and banana slices create an indulgent treat. The heat melts the chocolate spread while softening the bananas. Alternatively, try cream cheese, sliced strawberries, and a touch of honey. These options prove your contact grill’s versatility extends beyond savory applications.
Maintenance and Cleaning Tips
Proper care extends your appliance’s life and ensures food safety. Clean the grill plates after each use once they’ve cooled slightly but remain warm. This timing makes stuck-on food easier to remove. Use a damp cloth or sponge with mild dish soap. However, avoid abrasive scrubbers that might damage non-stick surfaces.
For stubborn residue, make a paste with baking soda and water. Apply this mixture to problem areas and let it sit for a few minutes. Then wipe clean with a damp cloth. This method works effectively without harsh chemicals. Additionally, it’s safe for all grill plate materials.
Many modern contact grills feature removable plates that are dishwasher safe. If yours has this feature, take advantage of it for deep cleaning. This convenience makes maintenance much easier. Nevertheless, check your manufacturer’s instructions before placing any parts in the dishwasher.
Inspect the drip tray regularly. Melted cheese and oils collect here during cooking. Empty and wash it frequently to prevent buildup and odors. This simple step maintains hygiene and prevents smoking during future cooking sessions. Moreover, it keeps your kitchen smelling fresh.
Troubleshooting Common Issues
Soggy bread indicates excessive moisture or insufficient heat. Try patting ingredients drier before assembly. Alternatively, increase the grill temperature slightly. You can also toast bread lightly before adding fillings. This extra step creates a moisture barrier. Therefore, your sandwich maintains better texture throughout.
Uneven browning suggests the grill isn’t heating uniformly. Check that both plates are clean and making proper contact. Some grills develop hot spots over time. Rotating the sandwich halfway through cooking can compensate for these irregularities. Additionally, this technique ensures balanced grill marks on both sides.
Sticking problems usually stem from insufficient oil or butter on bread surfaces. Always apply a light coating before grilling. If your plates are older, they might need re-seasoning. Some manufacturers provide specific instructions for this process. However, most modern non-stick surfaces don’t require special treatment beyond regular cleaning.
Cheese escaping from sandwiches happens when the grill applies too much pressure or when sandwiches are overfilled. Use less filling or select a grill with adjustable height settings. You can also place cheese further from the edges. This positioning keeps melted cheese contained within the bread boundaries.
Safety Considerations
Always use the grill on a heat-resistant, stable surface. Never place it near flammable materials or under cabinets. The appliance’s exterior can become quite hot during operation. Therefore, keep it away from counter edges where someone might accidentally touch it.
Use proper utensils when removing sandwiches. Spatulas or tongs work best. Never use your hands, even if you’re tempted by hunger. The bread surface and melted cheese can cause burns. Additionally, metal utensils might scratch non-stick surfaces, so choose wooden or silicone tools when possible.
Supervise children around the operating grill. The tempting aroma might draw curious youngsters too close. However, teaching them proper kitchen safety creates valuable life skills. Explain why maintaining distance matters and demonstrate safe operation when they’re old enough to help.
Unplug the appliance when not in use. This practice prevents accidental activation and reduces fire risk. Moreover, it saves energy and extends the grill’s lifespan. These small habits contribute to overall kitchen safety and efficiency.
Maximizing Your Kitchen Efficiency
Using your contact grill for multiple purposes streamlines meal preparation. You can grill vegetables while making sandwiches in the same session. This multi-tasking approach saves time and energy. Additionally, it reduces the number of dishes requiring cleaning afterward.
Meal prep becomes easier when you recognize your grill’s potential. Make several paninis on Sunday for the week ahead. Wrap them individually and refrigerate or freeze. When hunger strikes, simply reheat in the grill for a few minutes. This strategy ensures healthy, homemade options are always available. Therefore, you’re less tempted by less nutritious alternatives.
The versatility extends to entertaining guests. Set up a panini bar with various ingredients and let people customize their sandwiches. Your contact grill can handle multiple orders quickly. This interactive approach makes casual gatherings more engaging. Furthermore, it accommodates different dietary preferences and restrictions easily.
Conclusion
Your contact grill holds untapped potential as a sandwich maker that rivals dedicated panini presses. By understanding proper techniques, selecting quality ingredients, and mastering temperature control, you can create restaurant-quality sandwiches at home. The process becomes simple with practice, transforming this versatile appliance into one of your most-used kitchen tools.
Remember that successful panini making combines several elements: properly prepared equipment, thoughtfully assembled ingredients, appropriate cooking times, and regular maintenance. Each component contributes to the final result. However, don’t let perfectionism prevent experimentation. Some of the best recipes emerge from creative combinations and happy accidents.
Whether you’re preparing a quick breakfast, elegant lunch, or casual dinner, your contact grill stands ready to deliver. This multi-functional approach maximizes your kitchen investment while minimizing clutter. Moreover, it opens up endless culinary possibilities that keep meals interesting and satisfying.
Start with simple recipes and gradually explore more complex combinations. Your confidence will grow with each sandwich. Soon, you’ll wonder how you ever managed without this technique. The journey from basic grilled cheese to gourmet creations happens naturally through practice and curiosity.
Frequently Asked Questions
What temperature should I use for making paninis?
Medium to medium-high heat works best for most sandwiches. This range typically falls between 350 and 375 degrees Fahrenheit. The goal is to toast the bread golden brown while melting the cheese and warming fillings thoroughly. If your grill doesn’t display exact temperatures, start with the middle setting and adjust based on results. Bread that browns too quickly needs lower heat, while pale bread after several minutes needs higher temperature.
Can I make paninis without butter or oil on the bread?
While technically possible, adding butter or oil dramatically improves results. These fats create crispy, golden exteriors with enhanced flavor. Without them, bread may stick to the grill plates and won’t develop that desirable crunch. If you’re concerned about added calories, use a light brushing or cooking spray. The amount needed is minimal but makes a significant difference in texture and taste.
How do I prevent my sandwich from getting squashed flat?
Use sturdy bread varieties like ciabatta or sourdough that maintain structure under pressure. Avoid overfilling your sandwich, which forces the grill to compress it excessively. Some contact grills have adjustable height settings or floating hinges that adapt to sandwich thickness. If yours applies too much pressure, you can slightly prop open the lid during the first minute of cooking, then close it fully to finish.
Can I cook frozen ingredients in my panini?
It’s better to thaw ingredients first for even cooking and food safety. Frozen meats might not heat to safe temperatures while the bread burns. However, pre-cooked frozen items like grilled chicken strips can work if thawed slightly. Pat away excess moisture before assembling your sandwich. Fresh ingredients always yield superior texture and flavor compared to frozen alternatives.
How long do cooked paninis stay fresh?
Freshly made paninis taste best when eaten immediately. However, they can be refrigerated for up to two days in airtight containers. The bread will soften somewhat but can be refreshed by reheating in the contact grill for a minute or two. For longer storage, wrap tightly and freeze for up to one month. Thaw overnight in the refrigerator before reheating. Keep in mind that vegetables may release moisture during storage, affecting bread texture.
Related Topics:
7 Simple Hacks to Maintain Kitchen Appliances Running Smoothly
What Is a Ghost Kitchen? Understanding the Future of Dining and Food Delivery