Imagine stepping into a refreshing shower with a new shower head, delivering a gentle cascade of water that invigorates your senses. Installing a shower head from scratch might seem like a daunting task, but it’s actually a DIY home improvement project that can be both exciting and rewarding. In this guide, we’ll walk you through the step-by-step process of installing a shower head, ensuring that you achieve a well-installed fixture that enhances your shower experience.
Gathering Your Tools and Materials
Before diving into the installation process, it’s important to gather all the necessary tools and materials. Here’s what you’ll need:
Tools:
- Wrench
- Plumber’s tape
- Adjustable pliers
Materials:
- New shower head
- Thread seal tape
- Cloth
Preparing for the Installation
The first step is to ensure a smooth installation process. This involves a few key preparatory tasks:
- Turn off the Water Supply: Before starting any plumbing project, it’s crucial to turn off the water supply to the shower. This prevents any unexpected water flow during the installation.
- Clear the Shower Area: Clear out any items from the shower area to provide easy access to the installation site. This will make the process more convenient and efficient.
- Read the Manufacturer’s Instructions: Carefully read and understand the manufacturer’s instructions that come with your new shower head. These instructions will provide valuable guidance specific to the product.
Removing the Old Shower Head
Removing the old showerhead is a relatively straightforward process:
- Unscrew the Existing Shower Head: Use a wrench to unscrew the existing shower head. Turn it counterclockwise until it’s detached from the shower arm.
- Protect the Finish: To avoid scratching or damaging the finish of your shower arm, wrap a cloth around it before using the wrench.
- Check for Leaks or Damage: Once the old shower head is removed, inspect the shower arm for any leaks or damage. Address any issues before proceeding.
Cleaning and Inspecting the Shower Arm
The condition of the shower arm plays a role in the successful installation of the new shower head:
- Examine the Shower Arm: Inspect the shower arm closely for any signs of corrosion or damage. Address any issues before continuing.
- Clean the Threads: Use a cloth to clean the threads of the shower arm thoroughly. This ensures a secure connection with the new showerhead.
- Apply New Thread Seal Tape: Wrap new thread seal tape around the threads of the shower arm. This helps create a watertight seal when installing the new shower head.
Installing the New Shower Head

Now comes the exciting part – installing the new shower head:
- Apply Plumber’s Tape: Wrap the plumber’s tape around the threads of the new shower head. This tape helps create a tight and leak-free connection.
- Hand-Tighten the Shower Head: Gently hand-tighten the new shower head onto the threads of the shower arm. Ensure it’s aligned properly.
- Use Adjustable Pliers: To securely tighten the shower head, use adjustable pliers. Be cautious not to overtighten and risk damaging the fixture.
Testing for Leaks
With the new shower head in place, it’s time to test for leaks:
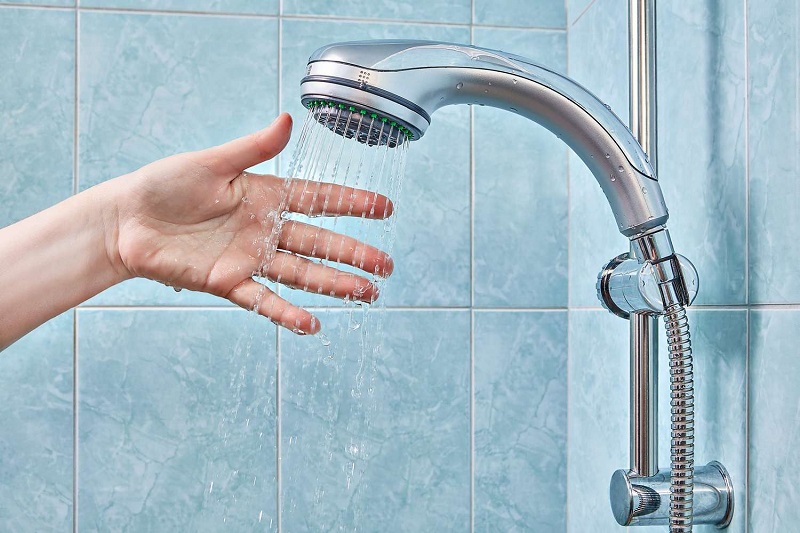
- Gradually Turn on the Water Supply: Slowly turn on the water supply to the shower. Monitor for any leaks around the connection.
- Check for Leaks: Carefully inspect the area around the shower head for any signs of water leakage. If there are leaks, you may need to tighten the shower head further.
Adjusting the Angle and Height
Ensuring the perfect water coverage is essential for a satisfying shower experience:
- Swivel the Shower Head: Adjust the angle of the shower head to direct the water where you want it. This customization enhances your comfort.
- Raise or Lower the Height: If your shower head is adjustable, consider raising or lowering its height to accommodate different users.
- Comfortable Water Coverage: Aim for a shower head angle and height that provides optimal water coverage for your body.
Choosing and Installing Shower Head Accessories
To further elevate your shower experience, consider these accessory options:
- Explore Extension Arms or Filters: Research accessories like extension arms for added reach or water filters for improved water quality.
- Installing an Extension Arm: If you opt for an extension arm, follow the manufacturer’s instructions to securely attach it to the shower arm.
- Adding a Water Filter: Enhance water quality by adding a water filter to your shower head setup. This can help remove impurities and provide cleaner water.
Cleaning and Maintenance
Maintaining your shower head ensures its longevity and optimal performance:
- Regular Cleaning: Clean your shower head regularly to prevent mineral buildup and clogs. This ensures consistent water flow.
- Using Vinegar or Mild Solution: Use vinegar or a mild cleaning solution to dissolve mineral deposits that can affect water pressure.
- Inspect for Mineral Buildup: Periodically check for mineral buildup in the shower head and clean it as needed to maintain efficient water flow.
Troubleshooting Common Issues
Address common issues to keep your shower head working perfectly:
- Low Water Pressure: If you’re experiencing low water pressure, check for clogs in the shower head or mineral buildup. Cleaning or replacing the shower head can help.
- Uneven Water Distribution: Adjust the flow of water by manipulating the shower head’s settings or using a flow regulator.
- Strange Noises: If you hear strange noises when using the shower, it could be due to air trapped in the system. Run the water for a while to eliminate the trapped air.
Upgrading to a Handheld Shower Head
Consider the benefits of a handheld showerhead:
- Advantages of a Handheld Shower Head: A handheld shower head offers flexibility and convenience, allowing you to direct water exactly where you need it.
- Removing the Existing Shower Head: If you’re upgrading to a handheld shower head, follow the same steps to remove the existing one.
- Installing the Handheld Shower Head Holder: Install the handheld shower head holder at a height and angle that suits your preferences.
Installing a Rainfall Shower Head
Indulge in a luxurious shower experience with a rainfall shower head:
- Exploring Rainfall Shower Heads: Rainfall shower heads provide a gentle, cascading water flow reminiscent of a natural rain shower.
- Upgrading the Shower Arm: Ensure your shower arm is sturdy enough to support the weight of the rainfall shower head.
- Installing and Adjusting: Follow the manufacturer’s instructions to install and adjust the rainfall shower head for the perfect shower experience.
Converting to a Dual Shower Head System
Experience the luxury of a dual shower head setup:
- Advantages of Dual Shower Heads: Dual shower heads offer enhanced water coverage and a spa-like shower experience.
- Installing a Diverter Valve: Install a diverter valve to switch between the two shower heads. This valve allows you to control the water flow easily.
- Ensuring Proper Water Pressure: Make sure your plumbing system can handle the water pressure required for both shower heads to function effectively.
Adding Smart Features to Your Shower
Embrace technology with smart shower head options:
- Exploring Smart Shower Heads: Smart shower heads offer features like digital temperature displays and remote control.
- Installing a Digital Temperature Display: Follow the manufacturer’s instructions to install a digital temperature display for precise water temperature control.
- Connecting to a Smart Home System: For added convenience, connect your smart shower head to a smart home system for remote control and customization.
Final Thoughts
Embarking on a DIY showerhead installation journey is not only satisfying but also empowering. By following these steps and guidelines, you can transform your daily shower routine into a more enjoyable experience. As you revel in the enhanced water flow and comfort, consider applying your newfound skills to explore other exciting home improvement projects. Remember, a well-installed showerhead is just the beginning of your journey to a more comfortable and inviting living space.
FAQs
- Can I install a showerhead without any plumbing experience?
Absolutely! This guide breaks down the process into easy-to-follow steps, making it accessible for beginners.
- What is plumber’s tape, and why is it important?
Plumber’s tape (thread seal tape) helps create a watertight seal between threaded connections, preventing leaks.
- How often should I clean my shower head?
It’s a good practice to clean your shower head every few months to prevent mineral buildup and maintain water flow.
- Can I upgrade to a rainfall shower head without changing the shower arm?
It’s recommended to ensure your existing shower arm can support the weight and size of a rainfall shower head for optimal results.
- Are smart shower heads difficult to install?
Most smart shower heads come with clear instructions for installation. If you’re comfortable following directions, the process should be manageable.