You cannot see them. You cannot feel them crawling. Yet dust mites are living in your bed right now. Millions of them. They feed on dead skin cells and thrive in warm, humid environments — and your mattress is the perfect home for them.
For many people, dust mites trigger allergies, disrupt sleep, and cause morning congestion that feels like a never-ending cold. The good news is that you do not need expensive treatments or professional cleaning services to fight back. A vacuum cleaner, used correctly, is one of the most powerful tools you have.
This article will show you exactly how to use it — step by step — so you can sleep better, breathe easier, and keep your bedroom genuinely clean.
Why Dust Mites Are a Bigger Problem Than Most People Realize
Dust mites are microscopic creatures. They are about 0.3 millimeters long, which means you will never spot one with the naked eye. What you might notice, however, are the symptoms they cause.
Their waste particles and shed body parts become airborne when you move in bed. Once airborne, they enter your lungs. For sensitive individuals, this triggers sneezing, itchy eyes, a runny nose, and even asthma attacks.
Studies suggest that up to 10 million dust mites can live in a single mattress. They multiply quickly in humidity above 50 percent and temperatures between 68 and 77 degrees Fahrenheit. Since most bedrooms fall right into that range, the conditions are almost always in their favor.
Therefore, regular cleaning is not optional — it is essential. And the vacuum cleaner is your first line of defense.
Choosing the Right Vacuum Cleaner for the Job
Not every vacuum cleaner is built for this task. Using the wrong one can actually make things worse. Some vacuums release fine particles back into the air during operation. That defeats the purpose entirely.
Here is what to look for when choosing a vacuum for your bed and bedroom.
HEPA Filtration Is Non-Negotiable
A vacuum with a HEPA filter captures particles as small as 0.3 microns. Dust mite allergens fall within this range. Without HEPA filtration, the particles pass through the machine and get released into the air you breathe.
Always check the product label. Look for “True HEPA” certification, not just “HEPA-style,” which does not meet the same standard.
Handheld or Upright — Which Works Better?
For mattresses and bedding, a handheld vacuum with a soft brush attachment often works better than a full-sized upright. It is easier to maneuver across the surface and press firmly into fabric layers.
However, if you only have an upright vacuum, it will still do a solid job. The key is using the right attachment and taking your time.
Look for Strong Suction Power
Dust mites and their waste particles cling to fabric fibers. You need strong suction to pull them loose. A vacuum with at least 200 air watts of suction is a good benchmark for this type of cleaning.
Additionally, some vacuums come with UV light attachments that kill mites on contact. While not strictly necessary, these can be a useful extra layer of protection.
Preparing Your Bed Before You Vacuum
Preparation matters as much as the vacuuming itself. Skipping this step reduces how effective the process will be.
Strip the Bed Completely
Remove all pillowcases, sheets, duvet covers, and pillow protectors. Wash them immediately in hot water — at least 130 degrees Fahrenheit. This temperature kills dust mites on contact.
Cold water washing does not kill mites. It may clean the fabric, but the mites survive. Therefore, always use the hottest water setting your fabric allows.
Air Out the Mattress First
Before vacuuming, let the mattress breathe for 15 to 20 minutes. If possible, open a window to allow fresh air to circulate. This helps loosen surface particles and slightly reduces moisture in the mattress fabric.
Moisture makes dust mites grip fibers more tightly. A drier surface means easier extraction during vacuuming.
Sprinkle Baking Soda for Extra Effect
This is one of the most effective bedroom cleaning hacks available — and it costs almost nothing. Lightly sprinkle baking soda across the entire mattress surface. Leave it for at least 15 minutes, or up to an hour if time allows.
Baking soda helps absorb moisture and odors. It also loosens particles embedded in the fabric, making them easier to vacuum up. After the wait time, you are ready to begin.
How to Vacuum Your Mattress Step by Step
This is the core of the process. Follow these steps carefully for the best results.
Step One: Attach the Right Tool
Use the upholstery attachment or the soft brush nozzle on your vacuum. Avoid hard plastic attachments without bristles — they glide over the surface without agitating the fibers enough to pull mites free.
If your vacuum has a rotating brush head, make sure it is appropriate for fabric. A rotating brush that is too aggressive can damage delicate mattress covers.
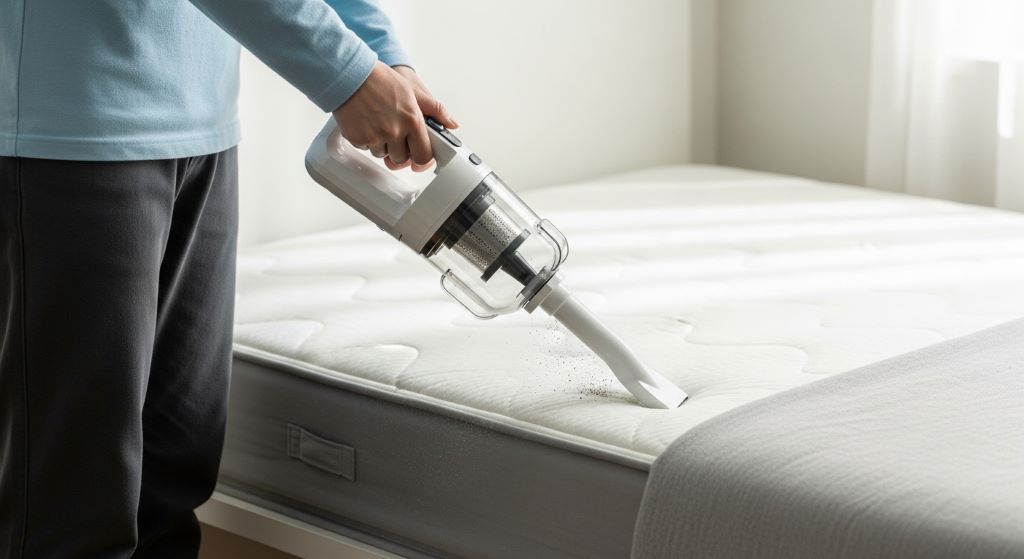
Step Two: Work in Overlapping Rows
Start at the top of the mattress. Move the attachment slowly across the surface in straight rows, overlapping each pass by about an inch. Slow, deliberate strokes give the suction more time to draw particles out of the fabric.
Do not rush this step. Speed is the enemy of thorough cleaning. A full queen-sized mattress should take at least 10 to 15 minutes to vacuum properly.
Step Three: Pay Attention to the Seams and Sides
Dust mites cluster along mattress seams, piping, and the sides of the mattress. These areas collect more debris and are often missed during quick cleaning sessions.
Use a narrow crevice tool to get into seams and edges. Run it slowly along every seam on the top, sides, and underside if accessible.
Step Four: Flip and Repeat
If your mattress is double-sided, flip it and repeat the entire process on the other side. Even single-sided mattresses benefit from vacuuming on the underside if the design allows it.
Additionally, vacuum the bed frame, headboard, and any slats or base beneath the mattress. Dust mites do not stay confined to the mattress alone.
Step Five: Empty the Vacuum Immediately
This step is critical. After vacuuming, take the vacuum outside or to a well-ventilated area and empty the canister or replace the bag immediately. If you empty it indoors, allergens can escape back into the bedroom air.
Seal the contents in a plastic bag before disposing of them. If your vacuum uses bags, use sealed disposal bags designed to lock allergens inside.
Cleaning Your Pillows and Bedding
The mattress is the main target, but pillows and other bedding need attention too.
Vacuum Your Pillows
Pillows harbor as many dust mites as mattresses — sometimes more, because your face rests directly on them. Use the upholstery attachment to vacuum both sides of each pillow, pressing firmly to draw out particles.
Wash pillows every three to six months in hot water, or follow the care label instructions. Some pillows are not machine washable, in which case regular vacuuming and airing out in sunlight become even more important.
Do Not Forget the Duvet and Comforter
After washing duvet covers, vacuum the duvet itself. Even inside a cover, duvets accumulate mites over time. A slow, thorough pass on both sides helps reduce this buildup significantly.
Sunlight is also a natural mite killer. On a dry, sunny day, hang your duvet outside for a few hours. The UV rays kill mites and freshen the fabric without any chemicals.
Bedroom Habits That Help Keep Dust Mites Away
Vacuuming is powerful, but it works best as part of a wider routine. These habits will help you remove allergens from your sleeping environment on a consistent basis.
- Wash bedding weekly in hot water above 130 degrees Fahrenheit.
- Use allergen-proof mattress covers and pillow encasements. These create a barrier between you and the mites living deeper in the fabric.
- Keep bedroom humidity below 50 percent. A dehumidifier helps in damp climates.
- Vacuum your mattress at least once every two weeks. Monthly vacuuming is better than nothing, but fortnightly is the real target for allergy sufferers.
- Remove unnecessary fabric items from the bedroom. Extra throw pillows, fabric curtains, and stuffed animals all collect dust and give mites more places to live.
- Dust hard surfaces regularly using a damp cloth. Dry dusting just moves particles into the air.
These bedroom cleaning hacks are simple, low-cost, and genuinely effective when practiced consistently.
How Often Should You Vacuum Your Bed?
The honest answer depends on your situation. For most people, vacuuming the mattress every two weeks strikes the right balance between effort and effectiveness.
However, if you suffer from allergies or asthma, weekly vacuuming is worth the extra effort. Children’s mattresses also benefit from more frequent cleaning because kids spend more time in bed and tend to sweat more, creating ideal mite conditions.
At a minimum, deep-clean your mattress at least four times a year — once each season. Pair this with washing all bedding and encasements on the same day for maximum impact.
When Vacuuming Is Not Enough
Sometimes, a vacuum alone cannot solve a severe dust mite problem. If your mattress is very old — more than eight years — it may be so deeply saturated with mite matter that surface cleaning has limited effect.
In this case, replacing the mattress is worth considering. When you do, invest in a quality allergen-proof encasement from day one. This prevents deep penetration and makes future cleaning far more effective.
Additionally, professional steam cleaning is an option for severe cases. Steam at high temperatures penetrates deeper into fabric layers than a vacuum can reach. Many professional cleaning services offer this for mattresses and upholstered furniture.
For ongoing protection, you can also use sprays designed to remove allergens from fabric surfaces. Look for products tested for effectiveness against dust mite allergens, and always choose formulas safe for use on bedding.
Common Mistakes to Avoid
Even with the best intentions, many people make small errors that reduce the effectiveness of their cleaning efforts.
Rushing is the most common mistake. Moving the vacuum too quickly across the mattress surface does not give the suction enough contact time. Slow down and be deliberate.
Using a vacuum without HEPA filtration is another frequent error. If the machine is releasing particles back into the air, you are not actually solving the problem — you are redistributing it.
Forgetting to clean the vacuum itself also undermines your efforts. Filters clog over time and reduce suction power. Clean or replace filters regularly according to the manufacturer’s instructions.
Finally, cleaning the mattress but skipping the pillows, duvet, bed frame, and floor beneath the bed leaves major mite habitats untouched. A complete clean means tackling every surface in the sleep environment.
Conclusion
Dust mites are a real and widespread problem, but they are manageable. A vacuum cleaner with HEPA filtration, used correctly and consistently, is one of the most effective tools available to any homeowner.
Start by choosing the right vacuum and attachment. Prepare your bed properly before you begin. Work slowly in overlapping rows, paying special attention to seams and edges. Extend your cleaning to pillows, duvets, and the bed frame. Empty the vacuum outside immediately after use.
Support your vacuuming routine with good daily habits — hot water washes, allergen-proof encasements, and humidity control. These steps together create a sleeping environment that is genuinely hostile to dust mites.
You do not need to tolerate morning sneezing, itchy eyes, or restless sleep caused by invisible allergens. With the right approach and a little consistency, your bed can become a genuinely clean and comfortable place to rest.
Frequently Asked Questions
How often should I vacuum my mattress to control dust mites?
For most people, every two weeks is the recommended frequency. If you have allergies or asthma, weekly vacuuming will give better results. At the very minimum, aim for once every month and a full deep-clean four times a year.
Does a regular vacuum cleaner remove dust mites, or do I need a special one?
A regular vacuum can help, but only if it has a HEPA filter. Without HEPA filtration, the vacuum may release fine mite particles back into the air. Always check that your vacuum uses true HEPA filtration before using it on your mattress.
Can I use baking soda on my mattress every time I vacuum?
Yes, baking soda is safe for regular use on most mattress types. It helps absorb moisture and loosen particles before vacuuming. Sprinkle it on, wait 15 minutes to an hour, then vacuum thoroughly. It is one of the simplest and most affordable bedroom cleaning hacks available.
Is sunlight effective at killing dust mites?
Yes. UV rays from direct sunlight can kill dust mites and help dry out moisture in fabric, which mites need to survive. Hanging pillows, duvets, and bedding in direct sunlight for a few hours is a natural and effective supplement to vacuuming.
What temperature kills dust mites in washing?
Water temperature of at least 130 degrees Fahrenheit (54 degrees Celsius) is needed to kill dust mites in bedding. Cold or warm water washing cleans the fabric but leaves mites alive. Always use the hottest setting the fabric label allows for bedding, pillowcases, and duvet covers.
Related Topics:
How to Get Rid of Flying Ants in the House: Effective Tips and Smart Solutions for a Pest-Free Home
How to Remove Deck Stain from Vinyl Siding