Imagine turning your kitchen scraps and yard waste into nutrient-rich soil that supercharges your garden—all while slashing your household trash by up to 30%. That’s the magic of composting, and if you’re short on space or time, a compost tumbler might just be your new best friend. In a world where landfills are overflowing and climate change looms large, starting composting in a tumbler offers a simple, efficient way to go green.
Whether you’re a busy urban dweller or a suburban gardener, this method makes backyard composting accessible and odor-free. In this comprehensive guide, we’ll walk you through everything you need to know to get started, from selecting the right tumbler composter to harvesting your first batch of “black gold.”
Why Choose a Compost Tumbler for Your Home Composting Setup?
Before diving into the how-to, let’s explore why tumbler composting stands out among other methods like traditional compost bins or worm composting. A compost tumbler is essentially a sealed barrel or drum that rotates on an axis, allowing you to mix and aerate your organic materials easily. This design speeds up the decomposition process, often producing usable compost in just 4-6 weeks compared to months with a static pile.
One major perk is pest control. Unlike open compost heaps that attract rodents and flies, tumblers are enclosed, keeping unwanted visitors at bay. They’re also ideal for small spaces—perfect for apartments with balconies or tiny yards. Plus, the tumbling action introduces oxygen, which promotes aerobic decomposition and minimizes foul smells. If you’re concerned about environmental impact, composting reduces methane emissions from landfills and enriches soil naturally, cutting down on chemical fertilizers.
According to environmental experts, households can divert about 20-30% of their waste through composting, contributing to sustainable living. If you’re new to eco-friendly practices, starting with a tumbler is less intimidating than managing a large outdoor pile, especially in colder climates where tumblers retain heat better.
Selecting the Best Compost Tumbler for Your Needs
The foundation of successful tumbler composting lies in choosing the right equipment. Compost tumblers come in various sizes, materials, and designs, so consider your household size, available space, and budget.
- Size Matters: For a family of four, opt for a 40-60 gallon tumbler to handle weekly kitchen scraps and yard debris without overflowing. Smaller 20-30 gallon models suit singles or couples.
- Material and Durability: Look for UV-resistant plastic or rust-proof metal to withstand outdoor elements. Brands like FCMP Outdoor or Miracle-Gro offer sturdy options with good reviews for longevity.
- Features to Prioritize: Dual chambers allow continuous composting—one side matures while you add to the other. Easy-turn handles and ventilation holes are must-haves for efficient aeration. Some models even include a base for collecting compost tea, a liquid fertilizer bonus.
Prices range from $50 for basic models to $200+ for premium ones. Check online retailers or local garden centers for deals, and read user feedback to ensure it suits your climate—insulated tumblers work well in cooler areas.
Don’t forget to factor in placement. Position your tumbler in a sunny spot to boost microbial activity, but ensure it’s accessible for regular turning.
Essential Materials and Ingredients for Tumbler Composting
Getting started doesn’t require fancy tools—just everyday items and a balanced mix of compostable materials. Think of composting as a recipe: you need “greens” for nitrogen, “browns” for carbon, and moisture for the microbes to thrive.
- Green Materials (Nitrogen-Rich): These provide moisture and speed up breakdown. Include fruit and vegetable peels, coffee grounds, tea bags, grass clippings, and fresh plant trimmings. Avoid meat, dairy, or oily foods to prevent odors and pests.
- Brown Materials (Carbon-Rich): These add structure and absorb excess moisture. Use dry leaves, cardboard shreds, newspaper, straw, or wood chips. Aim for a 2:1 ratio of browns to greens for optimal balance.
- Other Essentials: A garden fork or trowel for mixing, a watering can to maintain dampness (like a wrung-out sponge), and optional activators like manure or commercial starters to kickstart decomposition.
Gather these from your home: kitchen scraps in a countertop bin for easy collection, and yard waste from seasonal cleanups. Pro tip: Chop larger items into smaller pieces to accelerate the process in your rotating compost bin.
Step-by-Step Guide: How to Set Up and Maintain Your Compost Tumbler
Ready to roll? Follow this beginner-friendly tumbler composting guide to launch your setup successfully.
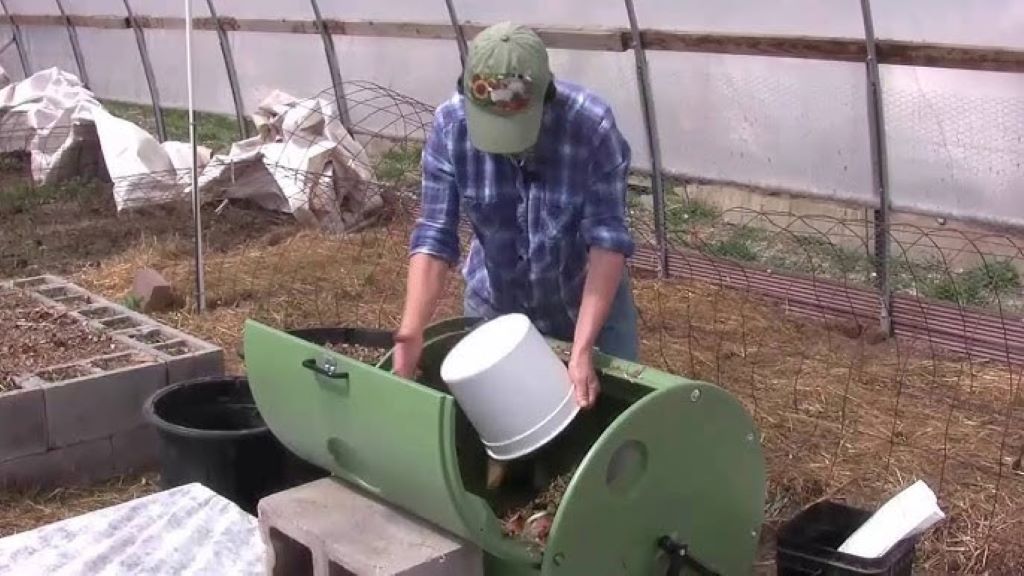
- Assemble and Position Your Tumbler: Unbox and follow the manufacturer’s instructions—most snap together in under 30 minutes. Place it on level ground in a semi-shaded area to avoid overheating in summer.
- Layer Your First Batch: Start with a base of browns like shredded leaves or cardboard for drainage. Add a layer of greens, then more browns. Moisten lightly if dry. Fill to about 2/3 capacity to allow tumbling room.
- Turn Regularly: The key to fast composting is aeration. Rotate the tumbler 3-5 times every 2-3 days. This mixes materials, distributes moisture, and introduces oxygen, preventing anaerobic smells.
- Monitor Moisture and Temperature: Check weekly—compost should feel damp but not soggy. In hot weather, add water; in rain, ensure drainage. Ideal temperatures range from 130-160°F for rapid breakdown; use a compost thermometer if desired.
- Add Materials Gradually: Continue layering greens and browns as you generate waste. Avoid overloading; if it gets too full, start a new batch in a dual-chamber model.
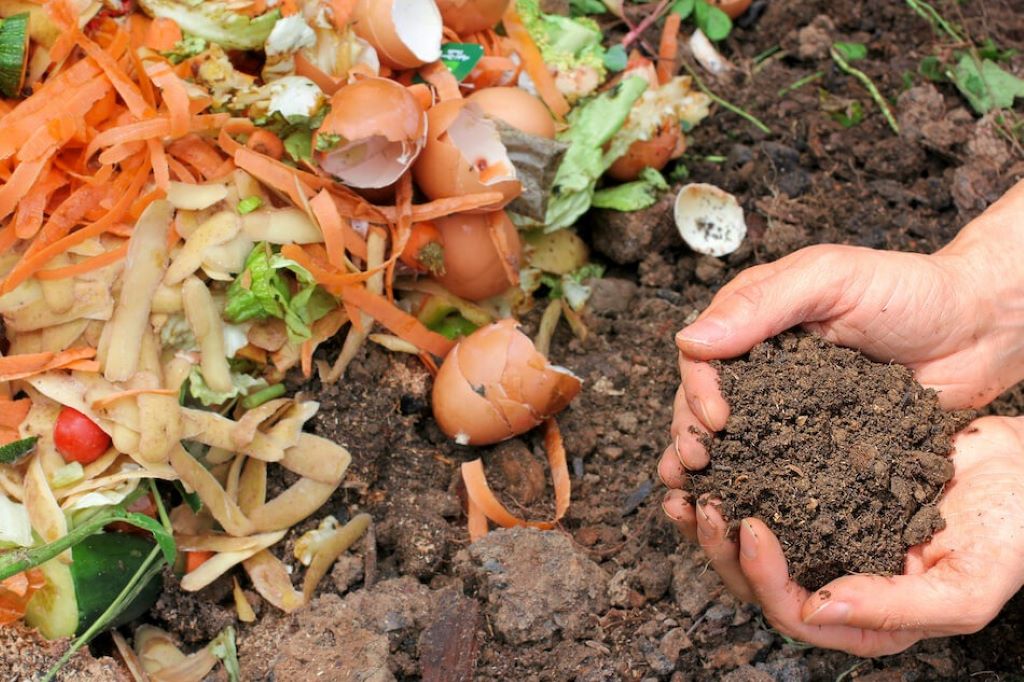
- Harvest Your Compost: After 4-8 weeks, when the material turns dark, crumbly, and earthy-smelling, it’s ready. Empty into a curing bin for 1-2 weeks to mature fully before using in gardens or pots.
Throughout, keep an eye on balance. Too many greens? Add browns to curb sliminess. Too dry? Sprinkle water during turns.
Tips for Success and Troubleshooting Common Issues
To make your composting journey smooth, incorporate these expert tips:
- Speed Up the Process: Add worms (vermicomposting hybrid) or bokashi pre-compost for faster results.
- Seasonal Adjustments: In winter, insulate the tumbler with blankets and add more browns to generate heat. Summer calls for frequent turning to prevent overheating.
- Odor Control: If smells arise, it’s often due to excess moisture or imbalance. Tumbling more and adding browns usually fixes it.
Common pitfalls include overwatering, which leads to anaerobic conditions, or adding non-compostables like plastics that contaminate the batch. If compost isn’t heating up, introduce more greens or a starter.
Troubleshooting: Fruit flies? Bury scraps deeper. Slow decomposition? Ensure regular turns and proper ratios. With practice, you’ll master these nuances for consistent, high-quality homemade compost.
Integrating Compost into Your Garden and Lifestyle
Once harvested, your tumbler compost enriches soil, improves drainage, and boosts plant health. Mix it into vegetable beds, use as mulch, or blend into potting soil. For lawns, top-dress to enhance nutrient uptake.
Beyond gardening, tumbler composting fosters sustainable habits. It reduces your carbon footprint, saves money on fertilizers, and teaches kids about recycling organic waste. Many communities offer composting workshops or rebates on tumblers—check local resources.
Frequently Asked Questions About Tumbler Composting
To address common queries and align with SEO FAQs:
- How long does it take to make compost in a tumbler? Typically 4-8 weeks with regular turning, faster than traditional methods.
- Can I compost in a tumbler year-round? Yes, but adjust for seasons; it works in cold weather if insulated.
- What can’t I put in a compost tumbler? Avoid meat, dairy, pet waste, diseased plants, or weeds with seeds to prevent issues.
- Is a compost tumbler better than a bin? For speed and convenience, yes—especially in urban settings.
- How do I know when compost is ready? It should be dark, crumbly, and smell like fresh earth, with no recognizable scraps.
These answers cover key user intents, ensuring the article is informative and searchable.
Wrapping Up: Turn Waste into Wonder with Tumbler Composting
Starting composting in a tumbler is a rewarding step toward eco-conscious living, transforming everyday waste into valuable garden gold. By following this guide—from selecting your tumbler to harvesting finished compost—you’ll enjoy faster results, fewer hassles, and a greener planet. Remember, consistency is key: regular turning and balanced inputs yield the best outcomes.
Read More:
The Ultimate Guide to Venus Fly Trap Care: Tips for Thriving Carnivorous Plants
Unearthing Secrets: 10 Little-Known Gardening Tips You Must Know