
Installing an awning can dramatically transform your outdoor space, providing shade, protection from the elements, and a touch of elegance. However, tackling this project on vinyl siding can seem daunting. Fear not! This comprehensive guide will walk you through the process, offering professional tips and addressing common concerns to ensure a successful and long-lasting installation.
Understanding the Challenges of Vinyl Siding
Vinyl siding, while durable and low-maintenance, presents unique challenges when installing an awning. Its thin, hollow construction makes it unsuitable for directly supporting the weight of an awning. Simply screwing into the vinyl will result in damage, instability, and potential water infiltration. Therefore, the key to a successful installation lies in locating and securing the awning to the underlying structural framing, typically the wall studs or sheathing.
Essential Tools and Materials
Before you begin, gather the necessary tools and materials:
- Awning Kit: Choose an awning that suits your needs and aesthetic preferences. Ensure it includes all necessary hardware and installation instructions.
- Stud Finder: An electronic stud finder is crucial for locating the framing members behind the vinyl siding.
- Drill and Drill Bits: A power drill with various drill bits, including a masonry bit (if drilling into concrete or brick foundation) and a pilot drill bit.
- Screws and Lag Bolts: Use exterior-grade screws or lag bolts, long enough to penetrate the framing and securely hold the awning.
- Flashing: Aluminum or vinyl flashing is essential for preventing water intrusion.
- Sealant: Use a high-quality, exterior-grade silicone or polyurethane sealant.
- Level: Ensure the awning is installed level for proper drainage and aesthetics.
- Measuring Tape: Accurate measurements are critical for precise installation.
- Pencil or Marker: For marking stud locations and drilling points.
- Safety Glasses and Gloves: Protect yourself from debris and sharp edges.
- Ladder: A sturdy ladder is necessary for reaching the installation height.
Step-by-Step Installation Process
-
Planning and Measurement:
- Begin by carefully measuring the desired location for your awning. Consider the area you want to shade and the size of the awning.
- Mark the awning’s width and height on the vinyl siding. Pay close attention to any windows or doors that might interfere with the installation.
- Consider the pitch of the awning. A slight downward slope is essential for proper water runoff.
-
Locating Wall Studs:
- Using your stud finder, locate the vertical wall studs behind the vinyl siding.
- Mark the stud locations with a pencil or marker.
- Double-check your findings by tapping on the siding; studs will sound solid compared to the hollow sound between them.
- If you have access to the inside of the wall, you can confirm the stud location from the interior.
-
Pilot Holes and Pre-Drilling:
- Before drilling into the siding, carefully drill pilot holes through the vinyl at the marked stud locations. This will prevent the vinyl from cracking.
- Use a drill bit slightly smaller than the screws or lag bolts you’ll be using.
- If you are drilling into concrete or brick foundation, use a masonry drill bit.
-
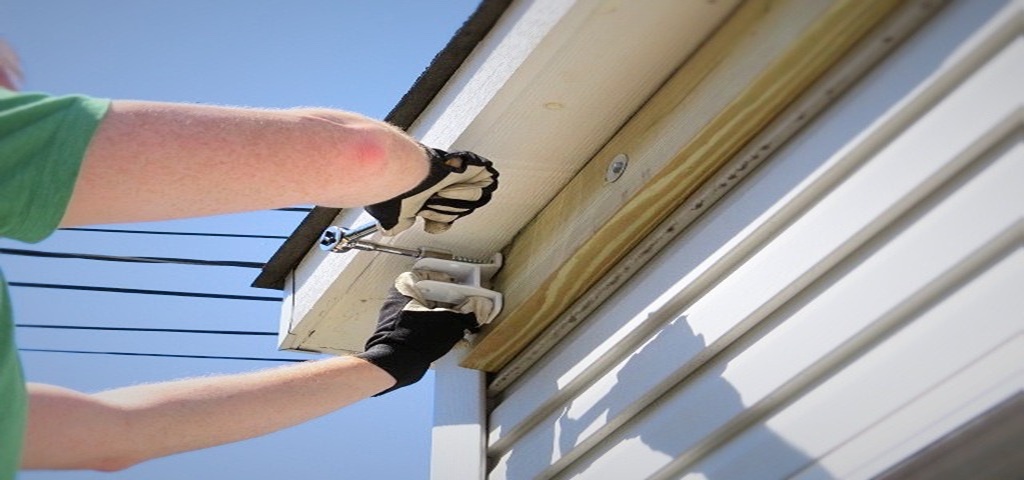
Attaching Mounting Brackets:
- Position the awning’s mounting brackets over the pre-drilled holes, aligning them with the stud locations.
- Use the appropriate screws or lag bolts to secure the brackets to the wall studs. Ensure they are firmly tightened.
- Use washers with lag bolts to increase the bearing surface.
- Double check the level of the brackets.
-
Installing Flashing:
- Cut the flashing to the appropriate length and shape to cover the top edge of the awning and the area where the brackets meet the siding.
- Slide the flashing behind the vinyl siding, ensuring it overlaps the top edge of the mounting brackets.
- Secure the flashing with screws or nails, ensuring it is flush against the siding.
- The flashing is crucial to divert water away from the screw holes.
-
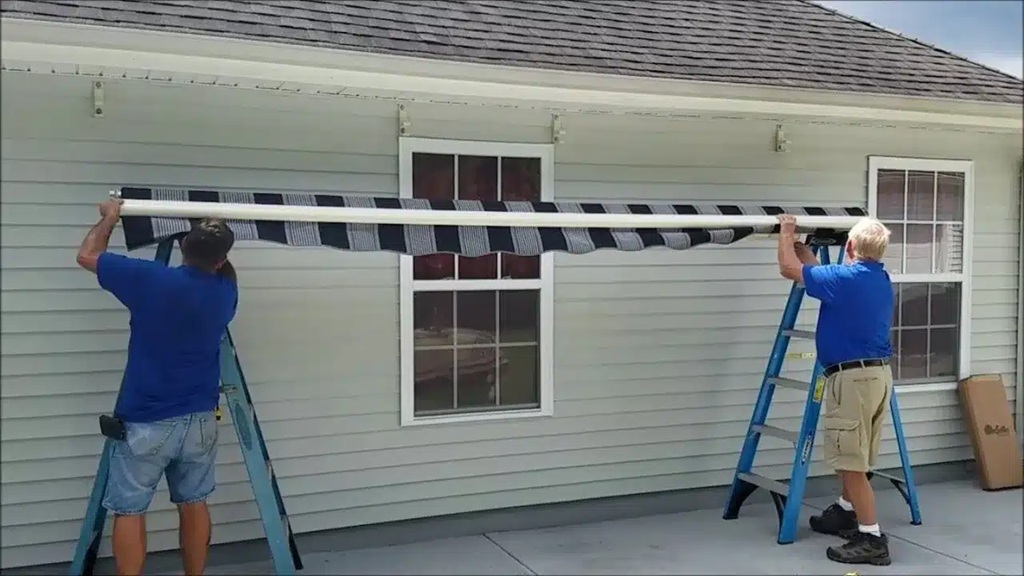
Assembling and Attaching the Awning:
- Assemble the awning according to the manufacturer’s instructions.
- Carefully lift the awning and attach it to the mounting brackets.
- Secure the awning with the provided hardware, ensuring it is properly aligned and level.
- Have a second person help to hold the awning in place.
-
Sealing and Finishing:
- Apply a bead of sealant around the edges of the mounting brackets, flashing, and screw holes to prevent water infiltration.
- Inspect the installation for any gaps or loose connections and address them accordingly.
- Clean up any debris and enjoy your newly installed awning.
- Allow the sealant to fully cure according to the manufacturer’s directions.
Discover More: What Are the Items for Decorating a House?
Professional Tips for a Flawless Installation
- Weather Considerations: Choose a dry, calm day for installation. Avoid installing in windy or rainy conditions.
- Weight Distribution: Ensure the awning’s weight is evenly distributed across the mounting brackets.
- Consult a Professional: If you’re unsure about any aspect of the installation, consult a professional contractor.
- Local Building Codes: Check local building codes and regulations before installing an awning. Some areas may require permits or specific installation guidelines.
- Vinyl Siding Specific Fasteners: If you are nervous about your ability to locate studs, there are vinyl siding specific fasteners that are designed to be used with vinyl siding. They still require care in installation, but can offer alternative attachment points.
- Consider the Awning Type: Retractable awnings, for example, have different mounting requirements than stationary awnings.
Read More Also: Why Neutral Colors Are the Timeless Choice for Home Interiors
People Also Ask (FAQs)
Q: Can I install an awning directly into vinyl siding?
A: No, installing an awning directly into vinyl siding is not recommended. Vinyl siding is too thin and weak to support the weight of an awning. You must locate and secure the awning to the underlying wall studs or framing.
Q: How do I find wall studs behind vinyl siding?
A: Use an electronic stud finder to locate the studs. You can also tap on the siding to listen for a solid sound, indicating a stud.
Q: What type of screws should I use for installing an awning on vinyl siding?
A: Use exterior-grade screws or lag bolts that are long enough to penetrate the framing and securely hold the awning.
Q: Do I need flashing when installing an awning on vinyl siding?
A: Yes, flashing is essential for preventing water infiltration. Install flashing behind the vinyl siding, overlapping the mounting brackets.
Q: How do I prevent water damage when installing an awning on vinyl siding?
A: Use flashing to divert water away from the screw holes and apply a high-quality sealant around the edges of the mounting brackets and flashing.
Q: Can I install a heavy awning on vinyl siding?
A: Yes, but you must ensure the awning is securely attached to the underlying framing. If you’re unsure, consult a professional contractor.
Q: What if I can’t find the studs?
A: If you cannot find the studs, you may need to remove a section of the vinyl siding to expose the framing. Alternatively, you can consult a professional contractor who has experience with this type of installation.
Q: What is the best sealant to use?
A: Use a high-quality, exterior-grade silicone or polyurethane sealant.
Q: How do I keep the awning level?
A: Use a level during the installation process to ensure the awning is properly aligned and level.
Conclusion
Installing an awning on vinyl siding requires careful planning, precise execution, and attention to detail. By following these steps and professional tips, you can successfully enhance your outdoor space with a beautiful and functional awning. Remember that safety is paramount, and if you’re ever unsure about any aspect of the installation, consulting a professional is always a wise decision. With patience and diligence, you can create a comfortable and stylish outdoor retreat that will provide years of enjoyment.


