Hey there, fellow mover! Moving can be quite an adventure, but it can also be a bit of a hassle, can’t it? Well, fear not, because today we’re going to tackle one specific aspect of the moving process: packing mops and brooms. These trusty cleaning tools might not be the first things that come to mind when you think about packing, but they deserve a bit of attention too. So, grab a seat, and let’s dive into the nitty-gritty of packing your mops and brooms for a smooth move.
Why Do You Need to Pack Mops and Brooms Properly?
Before we dive into the “how,” let’s quickly chat about the “why.” You might be wondering, “Why do I even need to worry about packing my mops and brooms properly?” Well, the answer is simple: to keep them in good shape and ready for action in your new place.
Imagine this: You’ve just moved into your new home, and it’s time to give it a good cleaning before settling in. You reach for your trusty mop, only to find it bent out of shape or the bristles on your broom all wonky because you didn’t pack them right. That’s not the way you want to start off in your new digs, right?
Properly packing your mops and brooms ensures they arrive at your new home in pristine condition, ready to help you keep things spick and span.
Gather Your Supplies
Okay, let’s roll up our sleeves and get started. First things first, gather up your packing supplies. You’ll need:
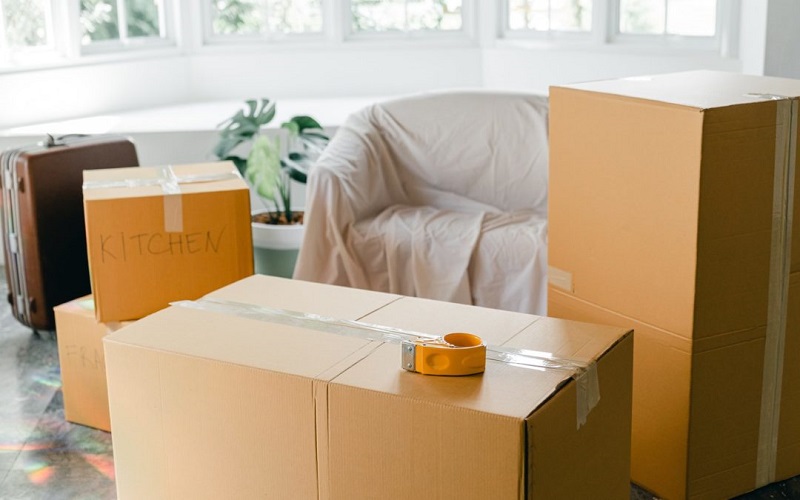
- Cardboard boxes: Find sturdy boxes that are large enough to accommodate your mops and brooms. You might even want to consider a wardrobe box for extra protection.
- Packing paper or bubble wrap: This will help cushion and protect your cleaning tools during transit.
- Packing tape: You’ll need this to seal up the boxes securely.
- Zip ties or twist ties: These come in handy for keeping your broom bristles in place.
- Scissors: For cutting tape and packing materials.
- Marker: Labeling your boxes is essential for easy identification later.
- Trash bags: These can be used to cover the bristles of your broom, keeping them clean.
Now that you’ve got your supplies, let’s move on to the fun part.
Step 1: Clean Your Mops and Brooms
Before packing, it’s a good idea to give your mops and brooms a quick cleaning. After all, you don’t want to bring any dirt or grime into your new home, right? Here’s how to do it:
- Shake off loose dirt: Take your broom outside and give it a good shake to get rid of any loose dirt or debris.
- Wipe down the handles: Use a damp cloth to clean the handles of your cleaning tools. This will prevent any sticky residue from transferring to your other belongings during the move.
- Wash mop heads: If your mop has a removable head, pop it in the washing machine if it’s machine-washable. If not, give it a thorough rinse and allow it to dry completely.
Now that your mops and brooms are looking spiffy, it’s time to move on to the next step.
Step 2: Disassemble if Possible
Not all mops and brooms can be disassembled, but if yours can, it’s a good idea to take them apart. This will make them easier to pack and reduce the risk of them getting damaged during the move. If you’re not sure how to disassemble your cleaning tools, check the manufacturer’s instructions or do a quick online search – there are plenty of tutorials out there.
Step 3: Protect the Bristles
One of the most crucial aspects of packing your brooms is protecting those bristles. After all, they’re the business end of the operation! Here’s how to do it:
- Wrap in packing paper or bubble wrap: Start by laying your broom flat on a piece of packing paper or bubble wrap. Gently fold the paper or wrap over the bristles and secure it in place with tape. Make sure to cover the bristles entirely, leaving no exposed areas.
- Use zip ties or twist ties: Once the bristles are wrapped, use zip ties or twist ties to keep them snugly in place. This step ensures that the bristles stay straight and don’t get bent or damaged during the move.
- Consider a broom cover: If you want to go the extra mile. You can invest in a broom cover or simply use a clean trash bag to cover the entire broom. This will protect it from dust and dirt during transit.
Step 4: Secure in a Box

Now that your broom is all snugly packed, it’s time to place it in a box. If you have a wardrobe box, that’s perfect for tall items like brooms. Here’s how to do it:
- Place the broom in the box: Stand your broom upright in the box, with the bristles at the bottom. If you have more than one broom or mop, you can stack them on top of each other, making sure to place a layer of packing paper or bubble wrap between them to prevent scratching.
- Fill any gaps: Use crumpled packing paper or bubble wrap to fill any gaps in the box and ensure that your cleaning tools don’t shift during transit.
- Seal the box securely: Once everything is in place, seal the box with packing tape. Be sure to label it clearly as “Brooms” or “Mops” so you can easily find them when you arrive at your new home.
Step 5: Packing Mops
Mops are a bit more straightforward to pack than brooms, but they still require some care. Here’s how to do it:
- Remove the mop head: If your mop has a removable head, take it off. This will make the mop easier to pack.
- Wrap the mop handle: Just like with the broom handle, use packing paper or bubble wrap to wrap the mop handle. Secure it with tape.
- Pack the mop head: If your mop head is machine-washable, you can toss it in the washing machine for a quick clean. Otherwise, rinse it thoroughly and allow it to dry completely before packing.
- Place in a box: Lay the wrapped mop handle in a box, and if you have multiple mop heads, stack them on top of each other with packing material in between.
- Fill gaps and label: Fill any empty spaces in the box with crumpled paper or bubble wrap, seal it up, and label it clearly as “Mops.”
FAQs (Frequently Asked Questions)
- Can I pack my mops and brooms with my other household items in the same box?
It’s generally best to pack your mops and brooms separately from your other household items. This prevents them from scratching or damaging other belongings and makes them easier to locate when you need them. If you do need to pack them in the same box. Be sure to wrap and secure them properly to avoid any mishaps.
- Do I need to clean my mops and brooms before packing them?
Yes, it’s a good idea to give your mops and brooms a quick cleaning before packing. This helps prevent dirt and grime from transferring to your other items during the move and ensures your cleaning tools are ready for use in your new home.
- Can I disassemble all the mops and brooms?
Not all mops and brooms can be disassembled, so check the manufacturer’s instructions or do a quick online search to see if yours can be taken apart. If they can, it’s a good idea to disassemble them for easier and safer packing.
- What if I don’t have a wardrobe box for my brooms?
If you don’t have a wardrobe box, you can still pack your brooms in a regular box. Just make sure to wrap and secure the bristles properly, fill any gaps with packing material to prevent shifting, and label the box clearly as “Brooms.”
- Can I use plastic bags instead of trash bags to cover my broom bristles?
Yes, you can use plastic bags to cover your broom bristles if you don’t have trash bags. The goal is to keep the bristles clean and protected during transit, so any clean plastic bag should do the trick.
Conclusion
And there you have it! Packing your mops and brooms might seem like a small task in the grand scheme of moving, but it’s essential to ensure they stay in tip-top shape for your new home. With a little care and the right materials, you’ll be ready to tackle any cleaning tasks that come your way in your new space. Happy moving!