
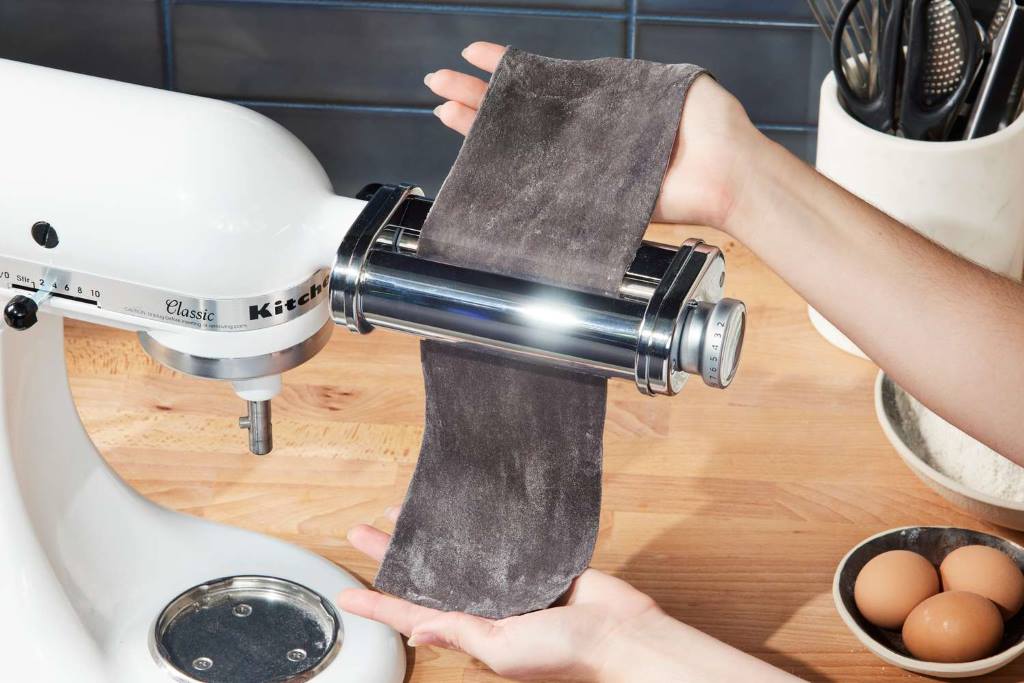
Imagine rolling out perfect sheets of fresh pasta. The dough glides smoothly through your rollers. Your cutters slice clean strands every time. This joy lasts when you care for your tools right. Many home cooks love KitchenAid pasta attachments for homemade noodles. Yet, proper care keeps them shining and safe.
You can clean KitchenAid pasta tools easily with dry methods. Start with a set like the KitchenAid 3-piece pasta roller. It turns your stand mixer into a pasta powerhouse. However, neglect leads to stuck dough and bacteria risks.
The CDC reports that raw flour in dough can carry E. coli or Salmonella. These cause 48 million foodborne illnesses yearly in the US. Residue on tools harbors germs. Therefore, clean after each use. This guide shows you how. Follow these steps for durable pasta gear that lasts years.
Why Clean KitchenAid Pasta Tools After Every Use
Fresh pasta tastes amazing. But dough sticks fast. Flour and eggs dry hard in rollers. If left, residue builds up. This jams gears and dulls cutters.
Moreover, safety matters most. The FDA warns that raw dough is risky. Bacteria grow in moist bits. Clean tools prevent cross-contamination. Your family stays safe.
Regular care extends life too. KitchenAid builds these from stainless steel. Yet, improper cleaning causes rust or scratches. In contrast, dry brushing keeps them pristine.
Many users forget this step. Then, they struggle with gunky rollers. You avoid that hassle. Spend five minutes post-session. Your next pasta night starts smooth.
Related:
Culinary Adventures: Kitchenware to Inspire Your Inner Chef
Tools You Need for Cleaning
Gather simple items. Most come with your set.
- Cleaning brush (included)
- Wooden toothpick or skewer
- Soft dry cloth
- Food-grade mineral oil
Avoid soap, water, or dishwashers. Water traps in gears. It dilutes lubrication and sparks rust.
These dry tools work wonders. They remove flakes without damage. Keep them handy near your mixer.
Step-by-Step: Clean Your Pasta Roller Right After Use
Finish rolling or cutting. Detach attachments from the mixer. Now, follow this process.
First, let pieces air dry one hour. Dough hardens. This makes removal easy.
Next, brush out dried bits. Use the included brush. Sweep rollers and cutters gently. Turn knobs to reach all areas.
Stubborn spots appear sometimes. Tap the attachment lightly on a counter. Flakes fall out. Or, use a toothpick. Poke carefully. Never use metal tools. They scratch stainless steel.
Then, wipe exteriors. A soft dry cloth polishes surfaces. Shine builds over time.
Finally, inspect closely. No residue? Great job. You maintain pasta roller set like a pro.
This routine takes minutes. Yet, it prevents big problems later.
Deep Cleaning Tips for Stuck Dough
Dough hides in crevices occasionally. Normal brushing misses it.
Try this trick. Make sacrificial dough. Mix flour and water only. No eggs. Roll through widest setting multiple times. It grabs old bits.
Repeat on thinner settings. Dough pulls out hidden flakes.
Afterward, brush again. Tap if needed. Toothpick dislodges strays.
Users swear by this method. One cook cleared years of buildup this way. Your rollers spin free again.
Avoid cloth through rollers. It warps mechanisms. Skip knives too. They gouge metal.
Stainless Steel Care Tips for Longevity
Your attachments gleam with stainless steel. This material resists stains. However, it needs protection.
Polish weekly with dry cloth. This removes flour dust. Shine returns fast.
Prevent rust always. Store in dry spots. Use original box. Or, a sealed container.
Dust lightly with flour before storage. It absorbs moisture.
These stainless steel care tips keep tools looking new. Friends notice the difference.
How to Lubricate for Smooth Operation
Gears need oil periodically. Do this annually or every 50 uses.
Use food-grade mineral oil. Add one drop per corner. Four spots total on rollers and cutters.
Run attachment briefly. Oil spreads evenly.
This step quiets noise. Rollers glide effortlessly. You feel the difference immediately.
Skip vegetable oils. They turn rancid. Mineral oil stays stable.
Lubrication extends life hugely. Durable pasta gear performs like day one.
Common Mistakes to Avoid
New users make errors. Learn from them.
Never submerge in water. Rust forms fast.
Dishwasher? Absolute no. Heat warps parts.
Metal scrapers damage finishes. Stick to wood or plastic.
Running cloth through rollers bends internals.
Ignore residue. Bacteria thrive. Clean every time.
Avoid these pitfalls. Your tools thank you.
Storage Secrets for Pasta Attachments
Proper storage prevents dust and damage.
Keep in original packaging. Brushes fit inside.
Or, use zip bags. Add silica packets for dryness.
Store away from humidity. Pantry shelves work well.
Detach from mixer always. This frees hub for other uses.
Good storage maintains pasta roller set ready anytime.
Troubleshooting Gunky Rollers
Rollers stick? Dough tears?
First, check dough consistency. Too wet causes issues. Add flour next batch.
Clean thoroughly. Old bits cause drag.
Lubricate if noisy.
Still problems? Run dry rice through. It scours gently.
Rarely, disassemble carefully. But, most fixes are simple cleaning.
You solve issues fast. Pasta flows smooth again.
Benefits of Clean Tools
Spotless attachments change everything.
Pasta sheets roll even. No rips or sticks.
Cutters slice clean strands. No frayed edges.
Food stays safe. No hidden bacteria.
Tools last decades. Save money long-term.
You cook confidently. Guests rave about noodles.
Clean KitchenAid pasta tools elevate your game.
Advanced Tips from Pro Users
Seasoned cooks share secrets.
Dust dough heavily during rolling. Less sticks initially.
Clean while warm. Dough brushes off easier.
Use compressed air for crevices. Blasts flakes out.
Make cleaning part of ritual. Like boiling water.
These habits build mastery. You join the pros.
Conclusion
You now know exactly how to clean KitchenAid pasta tools. Follow dry brushing, air drying, and occasional oiling. Your attachments stay pristine and safe.
Start today after your next session. Feel the smooth roll tomorrow.
Grab your brush. Clean now. Enjoy perfect pasta forever.
FAQs
How often should I clean my KitchenAid pasta roller?
Clean after every single use. Let dry one hour, then brush thoroughly. This prevents buildup and keeps tools safe.
Can I put KitchenAid pasta attachments in the dishwasher?
No, never. Water ruins gears and causes rust. Dry methods only for these stainless steel pieces.
What oil do I use for pasta roller lubrication?
Food-grade mineral oil works best. One drop per corner every 50 uses or yearly. It keeps everything gliding smoothly.
How do I remove really stuck dough from cutters?
Air dry first. Brush, tap, toothpick. Then, run plain flour-water dough through multiple times. It pulls out stubborn bits.
Is it safe to leave flour residue on pasta tools?
No. Raw flour harbors bacteria like E. coli. Clean fully each time to protect your family.
References
- https://producthelp.kitchenaid.com/Countertop_Appliances/Stand_Mixer_Attachments/Pasta_and_Grains/Pasta_Sheet_Roller/Clean_and_Lubricate_the_Pasta_Roller
- https://www.thekitchn.com/how-to-clean-kitchenaid-pasta-attachment-256765
- https://www.cdc.gov/food-safety/foods/no-raw-dough.html
- https://www.fda.gov/consumers/consumer-updates/flour-raw-food-and-other-safety-facts


