
To fix sloping bath floors in Atlanta, GA, you must sister sagging joists and apply self-leveling underlayment. Atlanta historic bungalows and humid clay soils often cause floor framing to sag over decades. Leveling and reinforcing the subfloor provides an unyielding base that keeps heavy bathtubs safe and stable.
Historic neighborhoods across Fulton County feature charming Victorian and Craftsman homes built with antique framing lumber. However, regional surveys show over 45 percent of century-old Atlanta residences develop noticeable floor slopes over time. Furthermore, a vintage cast iron tub can weigh 400 pounds empty and over 900 pounds full. This intense weight causes sagging floor joists to deflect downward, creating dangerous bathtub instability. Homeowners must level the framing and secure a clawfoot tub properly to prevent expensive structural floor failures.
Key Takeaways
- Subfloor Assessment: Check floor framing sag using long aluminum spirit levels and digital laser gauges.
- Sister Joists: Bolt pressure-treated framing lumber beside bowed joists to restore level structural planes.
- Underlayment Pouring: Pour polymer self-leveling cement compounds over primed wooden subfloors to smooth minor dips.
- Weight Distribution: Install reinforced bearing shims under bathtub feet to disperse point loads over joists.
- Moisture Management: Seal crawlspace earth with vapor barriers to stop humidity from rotting structural floor timbers.
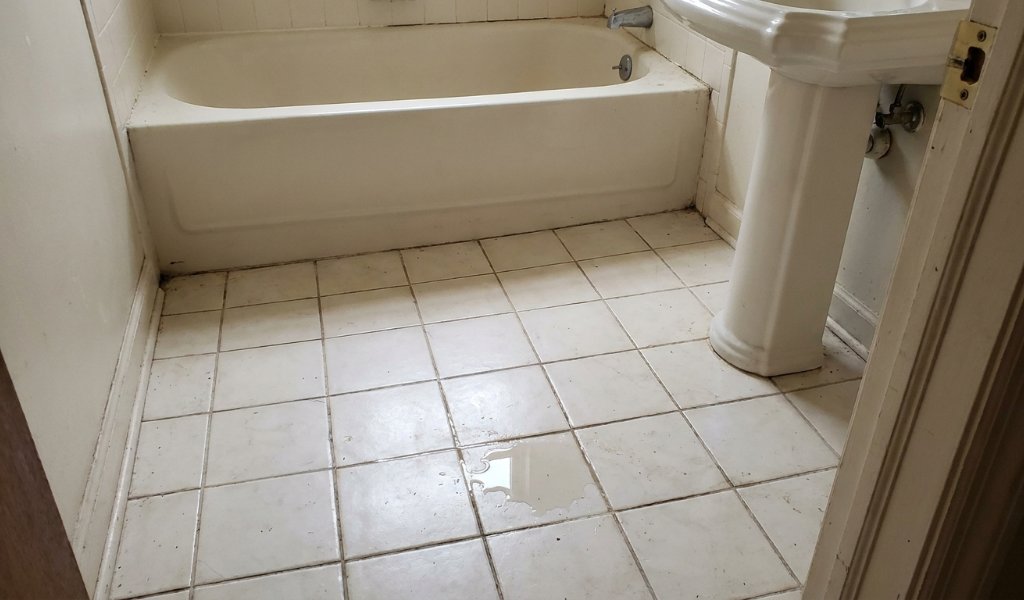
Why Atlanta Bathroom Floors Develop Uneven Slopes
Atlanta sits upon weathered Piedmont granite bedrock covered by thick layers of humid red clay. This native Georgia clay absorbs summer rainwater quickly and swells against masonry foundation piers. In dry autumn months, the soil loses moisture and shrinks away from support footings. Consequently, exterior foundation walls and interior support piers settle at noticeably different rates.
In addition, historic Atlanta bungalows in Grant Park and Inman Park feature undersized pine floor joists. Past builders spaced framing timbers widely without anticipating modern luxury bathroom fixtures. Over eighty years of constant dead load stress causes wooden joists to develop permanent downward bows. When homeowners install heavy modern tile above bowed joists, the entire room slopes toward the center.
Furthermore, vintage plumbing alterations severely weakened original structural framing lumber across many historic residences. Early plumbers frequently notched deep sections out of structural joists to route lead drain lines. Lifting heavy machinery safely demands careful leverage just as workers lift riding lawn mower decks using proper shop jacks. Without adequate structural sistering, notched joists bend and crack under heavy soaking tub installations.
Assessing Floor Framing Sag and Deflection Levels
Homeowners must measure floor slopes accurately before undertaking any structural bathroom repairs. Start by clearing the entire bathroom floor down to the bare subfloor plywood or original planks. Next, set a multi-line digital laser level on a stable tripod in the room center. Project horizontal laser lines across all four perimeter walls to identify high and low elevation spots.
Measure the vertical distance between the floor surface and the laser line every two feet. Record these measurements on a floor plan sketch to map room elevation contours accurately. If the floor drops more than one-quarter inch over ten feet, you must intervene structurally. Significant slopes place excessive tipping force on bathtubs and pull plumbing fittings apart.
In addition, inspect structural joists from the crawlspace or basement below using bright LED work lights. Check for cracked wood fibers, excessive bowing, and termite damage inside structural timbers. Periodic roof care follows a strict roof maintenance checklist to prevent leaks, and subfloors require similar thorough inspections. Identifying framing weaknesses early enables homeowners to reinforce floors before expensive bathroom tile installation begins.
Finally, measure existing joist spacing and total span length between foundation walls or bearing girders. Most historic Atlanta homes feature two-by-eight joists spanning over twelve feet without intermediate support columns. This wide span allows unacceptable bounce and deflection under heavy modern soaking tubs. Structural reinforcement must eliminate this bounce completely to create a safe, rigid bathing environment.
Sistering Joists to Restore a Level Subfloor Plane
Sistering involves attaching new structural lumber directly alongside existing damaged or sagging joists. First, clear obstructions like old electrical wiring and obsolete water supply pipes from the work zone. Next, position hydraulic bottle jacks beneath sagging joists supported by temporary timber posts. Raise the hydraulic jacks very slowly over several days to avoid cracking upstairs ceiling plaster.
Once you lift the sagging joist into a level horizontal plane, prepare the new lumber. Use kiln-dried structural two-by-eight or two-by-ten Douglas fir framing lumber for the sister pieces. Coat the mating faces with heavy-duty polyurethane construction adhesive before positioning the sister joist. Press the new lumber tight against the old joist along its entire span.
Then, secure the sister joist using half-inch structural carriage bolts or heavy structural screws. Drive fasteners in staggered zigzag patterns every twelve inches along the joist length. Staggering fasteners prevents splitting along the wood grain while maximizing mechanical clamping strength. Once bolted securely, the sistered joist holds the level plane permanently without sagging under tub loads.
Preparing the Subfloor Before Leveling
After reinforcing the joists, inspect the entire subfloor for soft spots, loose fasteners, water damage, and delaminated plywood. Replace damaged sections before applying any leveling compound. A leveling product cannot correct structural weakness underneath the finished floor.
Secure loose plywood or plank sections with appropriate structural screws. Avoid relying on nails that have loosened after decades of seasonal movement. Also, check around the bathtub drain, supply lines, and toilet flange for signs of previous leaks.
Next, clean the surface thoroughly and remove dust, paint, adhesive residue, and other contaminants. Follow the leveling compound manufacturer’s requirements for primer and substrate preparation. Proper bonding helps prevent cracking, separation, and hollow areas beneath the finished flooring.
Applying Self Leveling Underlayment
Self leveling underlayment works well for correcting smaller surface variations after the structural framing has been repaired. However, it should not replace joist reinforcement when the floor has significant structural deflection.
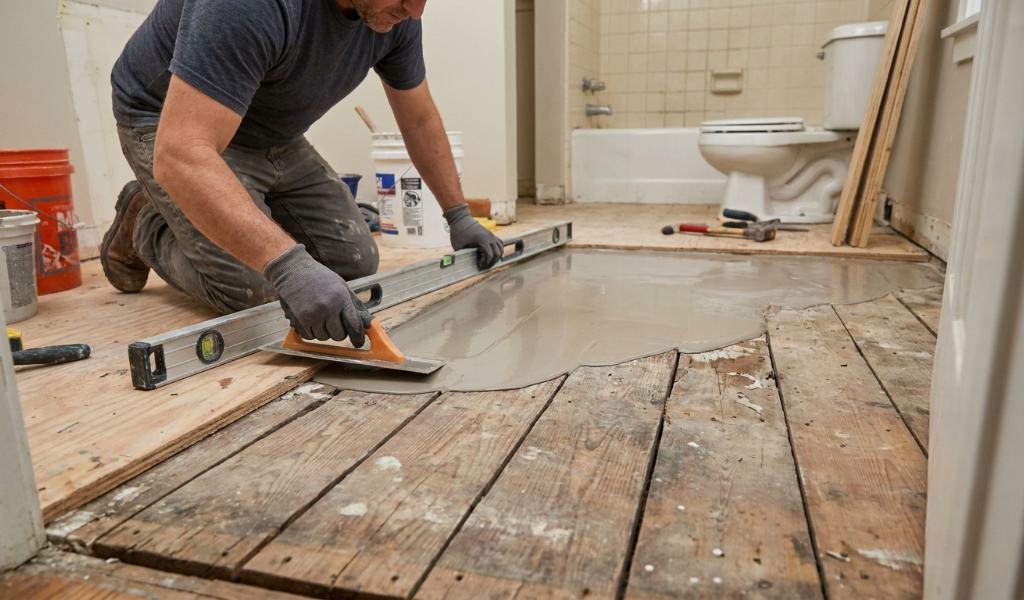
Begin by sealing gaps around walls, plumbing penetrations, and other openings. Install temporary dams where necessary to keep the liquid compound inside the bathroom. Then apply the recommended primer across the prepared wood subfloor.
Mix the underlayment according to the manufacturer’s instructions. Do not add extra water because excessive water can weaken the cured material. Pour the compound across the lowest areas and spread it with a gauge rake or suitable smoothing tool.
Allow the material to cure for the required period before installing tile, vinyl, or another finished floor. Keep the bathroom protected from excessive moisture and traffic during curing. Always follow the product’s installation specifications because curing requirements vary between formulations.
Distributing Bathtub Weight Across the Floor
A bathtub creates concentrated loads rather than distributing its entire weight evenly across the room. The tub itself, occupants, and water can therefore place substantial stress on individual joists.
Position the bathtub so its major load points receive adequate structural support. For freestanding tubs, verify that each foot sits firmly on a stable, level surface. Use manufacturer approved leveling components rather than improvised materials.
For heavier cast iron tubs, inspect the joist layout carefully before installation. A structural engineer or qualified contractor can determine whether additional blocking, beams, or posts are necessary when existing framing cannot safely carry the load.
After positioning the tub, check it with a level from multiple directions. Confirm that the tub remains stable when weight shifts inside it. Movement at this stage can indicate an unresolved framing or support problem.
Managing Atlanta Moisture and Crawlspace Conditions
Moisture control remains important after leveling the bathroom floor. Atlanta’s humid climate can contribute to elevated crawlspace moisture, wood decay, and fungal growth when ventilation and drainage remain inadequate.
Inspect the crawlspace for standing water, wet soil, damaged insulation, and deteriorated wood. Check plumbing connections beneath the bathroom for slow leaks that could gradually damage the repaired framing.
Where appropriate, install a properly sealed crawlspace vapor barrier and improve drainage around the foundation. Keep exterior gutters and downspouts directed away from foundation walls. These measures help reduce moisture exposure around structural floor components.
Also, inspect the bathroom regularly after completing the repair. Look for new floor movement, cracked grout, recurring leaks, or doors that suddenly stop closing properly. These signs can indicate continuing structural movement.
When to Hire a Structural Professional
Some sloping bathroom floors require professional structural evaluation rather than a simple leveling project. Contact a qualified structural professional when you find severely cracked joists, extensive rot, termite damage, failing foundation supports, or substantial floor movement.
Professional evaluation also makes sense when the floor continues to slope after reinforcement. The underlying problem may involve foundation settlement rather than isolated joist deflection.
Historic Atlanta homes deserve additional care because previous renovations may have altered their original load paths. A contractor should therefore inspect the complete framing system before removing structural components or adding heavy fixtures.
Do not attempt to force severely settled framing back into position quickly. Rapid lifting can damage plaster, tile, plumbing connections, walls, and other structural elements. Controlled correction provides a safer approach when significant settlement exists.
Final Steps for a Stable Bathroom Floor
Once the framing and subfloor are structurally sound, complete the surface preparation required by the chosen flooring system. Confirm that the finished surface meets the manufacturer’s flatness requirements before installing tile or other materials.
Install the bathtub only after confirming that the supporting surface remains level and rigid. Recheck the tub after connecting the drain and water supply because plumbing connections should not force the fixture into an unstable position.
Finally, inspect the completed bathroom periodically. Atlanta’s older homes can experience gradual structural changes, so early detection helps prevent minor floor movement from becoming a major repair.