Maybe a baseball took a detour through your living room, or a particularly strong gust of wind had a grudge against your windows. Whatever the reason, you’re in luck because today, I’m going to guide you through the process of fixing that shattered glass like a pro.
Why Fixing a Broken Window Pane is a DIY Adventure
Before we dive into the nitty-gritty, let’s address the elephant in the room: why bother fixing it yourself when you can call a professional? Well, there are several good reasons:
- Cost-Effective: Hiring a pro can be expensive, especially if it’s a small job. By doing it yourself, you’ll save some bucks for that pizza party you’ve been planning.
- Empowerment: There’s something deeply satisfying about tackling home repairs yourself. It’s a great way to learn new skills and build your confidence as a handy homeowner.
- Time-Saving: Small repairs like this can be done relatively quickly, especially when you have all the materials ready. No need to wait around for a technician to fit you into their schedule.
- Customization: You get to choose the glass, the style, and the design that suits your home’s aesthetic. It’s a chance to put your personal touch on your living space.
- Environmentally Friendly: Reducing waste by repairing instead of replacing is eco-conscious. Mother Earth will thank you!
Now that we’ve established why you should take this DIY route, let’s roll up our sleeves and get started on fixing that broken window pane.
Materials You’ll Need
First things first, let’s gather up the tools and materials you’ll need for this mission. Make sure you have everything ready before you start. Here’s what you’ll need:
- Safety Gear: Safety first! Grab some gloves, safety goggles, and a dust mask. Broken glass can be nasty, so protect yourself.
- Replacement Glass: Measure the size of the broken pane and get a piece of glass cut to match. You can usually find glass at your local hardware store.
- Glazing Compound or Putty: This is the stuff that will hold the glass in place. Make sure it’s suitable for windows and can withstand weather changes.
- Glazing Points: Tiny metal pieces that help hold the glass in place. You’ll need a few of these to secure your new pane.
- Paint and Primer: If your window frame is wooden, you might need some paint and primer to touch up the frame after the repair.
- A Putty Knife: This will come in handy for applying the glazing compound.
- A Hammer and Nails: You might need these to remove the old glazing points or secure the new ones.
- A Utility Knife: Useful for cutting away old putty and cleaning up the edges.
- A Paint Scraper: Helps in removing old paint and putty from the window frame.
- Sandpaper: To smoothen the window frame before painting.
- Rags and a Bucket of Water: For cleaning up the mess as you go.
Alright, now that you’ve got your tools and materials gathered, it’s time to put on your DIY superhero cape and get to work.
Step 1: Safety First!
Before we jump into the action, let’s not forget our safety gear. Put on those gloves, safety goggles, and that dust mask. It may seem like overkill, but trust me, you don’t want glass shards in your eyes or lungs.
Step 2: Remove the Broken Glass
Now, it’s time to bid farewell to that shattered glass. Carefully use your putty knife to remove any remaining shards from the window frame. Take your time and be gentle – we don’t want any accidents here.
Step 3: Remove Old Glazing and Putty
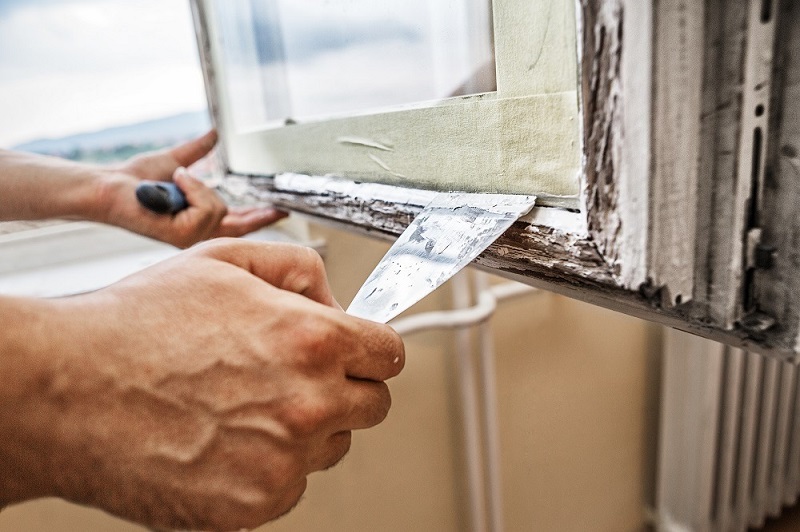
The next step is to remove the old glazing compound or putty. You can use your utility knife and a paint scraper for this. Be thorough, and make sure you clean up the edges properly.
Step 4: Prep the Window Frame
With the old glazing and putty out of the way, it’s time to prepare the window frame for the new glass. Sand it down to create a smooth, clean surface. If there’s any peeling paint, now’s the time to remove it.
Step 5: Apply Primer and Paint (If Necessary)
If your window frame is wooden and needs a touch-up, apply a primer first, followed by your paint of choice. Let it dry completely before moving on to the next step. Patience is key here.
Step 6: Insert the New Glass
Here comes the fun part – inserting the new glass. Carefully place it into the frame. If it’s a snug fit, that’s good news. If it’s a bit loose, don’t worry; you can use glazing points to secure it.
Step 7: Secure the Glass with Glazing Points
Using a hammer, gently tap in the glazing points around the edges of the glass. These little fellas will keep the glass in place. Space them out evenly, about every 4-6 inches.
Step 8: Apply the Glazing Compound or Putty
Now, it’s time to seal the deal, quite literally. Take your glazing compound or putty and roll it into a thin rope-like shape. Press it into the gaps between the glass and the frame. Use your putty knife to smooth it out and create a clean, neat edge.
Step 9: Clean Up Excess Glazing Compound
As you work your way around the frame, make sure to clean up any excess glazing compound. You want your repair job to look as good as new.
Step 10: Let It Dry
Patience, my friend. Let the glazing compound or putty dry according to the manufacturer’s instructions. It may take a day or two, so resist the urge to touch it.
Step 11: Paint the Frame (If Necessary)
If you’ve painted the frame earlier, you might need a touch-up after the glazing compound has dried. Make sure it matches the rest of your window frame.
Step 12: Clean Up
Once everything is dry and looking fabulous, clean up the area. Dispose of the broken glass and any debris properly. Your room should be back to its sparkling self!
Voila! You’ve successfully fixed that broken window pane. Give yourself a pat on the back; you’re officially a DIY window repair pro.
FAQs (Frequently Asked Questions)
Can I use any type of glass for the replacement?
You should use safety glass or regular window glass for replacements. Safety glass is a wise choice, especially if the window is prone to accidents.
What if the frame is made of metal or vinyl instead of wood?
The process is pretty much the same. You won’t need to worry about sanding or repainting, but you’ll still secure the glass with glazing points and glazing compound.
How long does it take for the glazing compound to dry completely?
It depends on the product you’re using, but it usually takes at least a day or two. Be patient and avoid disturbing it during this time.
Can I replace a double-pane or insulated glass window myself?
It’s not recommended. Double-pane windows are more complex and typically require professional replacement to maintain their insulation properties.
What if I mess up the glazing compound or putty application?
No worries! You can always scrape off the excess and redo it while it’s still soft. Just be careful not to disturb the glazing points.
Remember, with a bit of patience and the right tools, you can tackle many home repair projects like a champ. Fixing a broken window pane is just one of those satisfying DIY tasks that make you feel like a true homeowner. So, go ahead, give it a shot, and enjoy the view through your newly repaired window!


